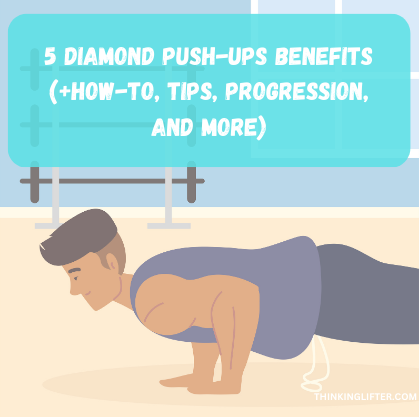
Diamond push-ups are among the most popular bodyweight exercises, so let’s discuss them.
Read on to learn about the diamond push-ups benefits, what muscles the exercise targets, how to master it, and much more.
Ready? Let’s dive in.
More...
What Is The Diamond Push-Up?
Diamond push-ups are an effective exercise where trainees leverage their body weight to create the necessary training stimulus for growth and strength gain.
The variation is similar to classic push-ups, apart from one difference: the hands are positioned close with the thumbs and index fingers forming a diamond shape.
Having the hands in such a close position puts the chest muscles at a mechanical disadvantage, forcing the triceps to do more work for you to complete your repetitions.
The chest, shoulders, and serratus anterior still play a considerable role, but the typical diamond push-up set will cause more tension in the triceps than if you used a wider stance.
Given the hand stance, diamond push-ups are more challenging than traditional ones and aren’t suitable for complete beginners.
Diamond Push-Ups Muscles Worked
Diamond push-ups train the following muscles:
- Triceps brachii (triceps)
- Pectoralis major (pecs; chest)
- Anterior deltoids (front shoulder portion)
- Serratus anterior (commonly known as the boxer’s muscle)
- Midsection (abs, obliques, transverse abdominis, etc.)
Diamond Push-Ups Benefits: 5 Reasons to Include These In Your Program
1. Train the Triceps
As mentioned in the previous point, the primary benefit of diamond push-ups is that they train the triceps.
Having your hands close reduces the involvement of your chest, forcing the triceps to do the majority of work required for you to descend and return to the top position.
2. Develop the Chest and Serratus Anterior
Despite not being as active, the chest still plays a role during diamond push-ups, and you can expect the exercise to build up the muscle group.
In addition, the serratus anterior (the boxer’s muscle) also contributes. Its primary function during diamond push-ups and other variations is to help with scapular movement and stability.
3. Promote Core Stability
Given the narrow hand stance, diamond push-ups make it more challenging to maintain a stable position, which forces your core musculature to work extra hard to keep you balanced.
4. Great For Equipment-Free Workouts
No workout equipment? No problem. One of the most prominent diamond push ups benefits is that you can do the exercise almost anywhere, even if you don’t have equipment.
Do the movement at home, as part of your gym routine, or while on the road and lacking any workout equipment.
5. You Can Adjust the Difficulty
As mentioned above, diamond push-ups are more challenging than other variations, but you can adjust the difficulty to fit your current abilities.
For instance, supporting yourself on your knees allows you to press a smaller percentage of your body weight, making the exercise easier. Similarly, performing the activity at an incline, such as by placing your hands on a chair, flat gym bench, or kitchen counter, makes it easier.
In contrast, elevating your feet allows you to perform decline diamond push-ups, which are more challenging and work your upper chest.
How to Do Diamond Push-Ups Step-By-Step
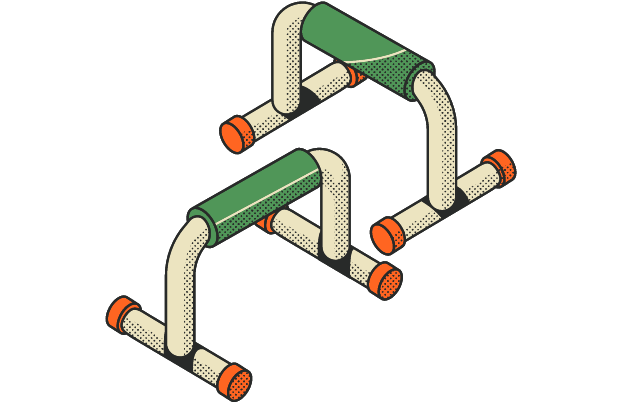
To perform diamond push-ups, get down on all fours and place your hands together with your thumbs and index fingers making a diamond shape. If keeping your hands flat on the floor leads to discomfort, you can use push-up stands instead. Push-up stands allow you to keep your wrist straight while doing the exercise.
- Straighten your arms, extend your legs, and plant your toes on the floor for support.
- Contract your abs to draw your ribcage closer to your pelvis and create a slight, neutral rounding in the lower back.
- Take a deep breath and lower yourself to the floor as much as your triceps strength allows––ideally until your face is a couple of inches from the floor.
- Pause briefly and press to extend your arms, bringing yourself to the top. Exhale near the top while maintaining ab tightness.
4 Diamond Push-Up Mistakes to Avoid
1. Using a Partial Range of Motion
A common mistake trainees make with diamond push-ups is shortening the range of motion to complete more reps.
Limiting the range of motion affects the exercise’s overall effectiveness. So, rather than trying to bang out as many reps as possible, do each through a full range of motion and slowly increase the number of reps you’re doing. The result will likely be much better.
2. Allowing Your Midsection to Sag
Another common mistake seen in most push-up variations is relaxing the midsection, which causes the buttocks to sag to some degree.
Doing so creates instability, affects your range of motion, and can lead to lower back stress.
Avoid the mistake by bracing your abs at the start of each set and maintaining the rigid position.
3. Flaring Your Elbows
Elbow flare is another mistake to be mindful of. Doing so can lead to shoulder pain and affect your performance.
Set yourself up correctly by placing your hands next to one another with your index fingers and thumbs forming a diamond shape. When you’re at the top position, your hands should be directly underneath your lower chest.
If you’re using push-up stands, keep your hands angled in the same way to prevent your elbows from pointing to the sides.
4. Not Progressing In Any Way
Many trainees make the mistake of doing the same number of reps and sets week after week, wondering why they can’t see good results from diamond push-ups.
Like any resistance exercise, diamond push-ups are effective when trainees push themselves harder and do more work.
The most obvious way to progress push-ups is to do more reps, but you can also increase the difficulty by:
- Tweaking your rep tempo
- Experimenting with variations
- Including an external weight
We will discuss some of these options in the next point.
Diamond Push-Up Progression (Even If You Can’t Do One Rep)
Level 1: Regular Push-Ups
You must first master the regular push-up before attempting diamond push-ups. Have your hands shoulder-width apart or slightly wider, with your elbows at a 45-degree angle to your torso.
I recommend working up to 12-15 regular push-up reps before moving to the next level.
If you can’t do a single regular push-up, begin with knee and incline push-ups.
Level 2: Semi-Diamond Push-Ups
The second level is slightly more challenging but similar to level one. Here, the goal is to bring your hands closer, with your thumbs and index fingers a few inches apart.
At this point, you should feel more tension in your triceps when doing reps. Work up to 10-12 reps before moving to the next level.
Some people should stick to these push-ups and not perform diamond push-ups if they feel ulnar wrist pain or elbow pain from having their hands too close.
Level 3: Knee Diamond Push-Ups
The next level is to bring your hands together for diamond push-ups but support yourself on your knees.
I recommend doing that to get a feel for the exercise and ensure that the hand position doesn’t cause discomfort or pain.
Once you can do 15 to 20 solid reps, move on to the final level.
Level 4: Diamond Push-Ups
Well, you’ve made it. You’ve built up good strength and can now bang out a set of at least ten diamond push-ups.
However, that doesn’t mean you’re done pushing yourself. You must now continue to work hard:
- Work up to 15, 20, and even 25+ reps per set
- Elevate your feet on a chair or gym bench to make diamond push-ups more challenging
- Wear a weight vest or have someone place a weight plate on your back
Final Tips For Safe And Effective Diamond Push-Ups
1. Warm-Up Well
Warming up well before training is crucial for performing at your best and reducing the risk of pain and injuries.
Despite being a bodyweight exercise, the diamond push-up is challenging, and you should take your time to prepare before each workout.
Begin with a few minutes of light cardio––incline walking on a treadmill, jumping jacks, jogging in place, high knees, etc. From there, proceed to dynamic stretches like arm rotations, taking care to warm up your wrists, elbows, and shoulders.
Once done with that, perform a couple of warm-up sets to further prepare your muscles, joints, and connective tissues. If you’re going to do diamond push-ups as the first exercise, start with some knee or incline diamond push-ups.
2. Experiment With Your Hand Position
My second advice for diamond push-ups is to try a few hand positions to see what feels most natural. The classic version is to form a diamond shape between your thumbs and index fingers, but that might cause wrist or elbow pain.
In such a case, use a slightly wider grip because pain-free training is infinitely more important than doing an exercise ‘by the book.’
3. Emphasize Proper Form
Regardless of the kind of diamond push-up you’re doing, always prioritize proper technique and do each repetition through a full range of motion.
Do reps slowly and with excellent body control, taking care to maintain a solid body position without letting your midsection sag.
4. Use Push-up Handles/Stands
Keeping your hands flat on the floor can lead to some wrist discomfort, especially if you do push-ups often. Push-up handles are a fantastic tool for most people because they allow trainees to maintain straight wrists while doing the exercise.

Final Words On Diamond Push-Ups Benefits
Diamond push-ups are a fantastic tricep exercise, but they are not easy. Take your time to go through the proper progression and be patient.
Begin with regular push-ups and gradually work up to diamond push-ups. Also, consider push-up handles to keep your wrists neutral while performing the exercise.
Reap the associated diamond push-ups benefits by performing the movement frequently, focusing on steady progression, and training with proper form.
Read next:
Leave a Reply